I like to embroider things. Sure, they sell handy patterns that you can just iron onto whatever you are embroidering. The thing is that I'm cheap and don't like to actually pay for those. Also, a lot of the time those patterns are very old fashioned looking. Usually what I do is look for an image that I like online (Hooray Google Image Search!), resize it, then print it out.
For smooth fabrics, like when I embroidered my
dishtowels, I just used some transfer paper to get my image on the project. The problem is that fabrics with more texture, such as terry cloth
bibs, transfer paper doesn't really work. Here's a little trick I found to help in that situation.

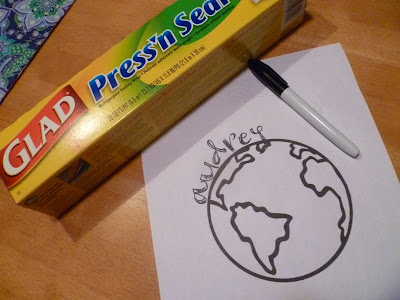
You'll need a permanent marker (a finer tip than the one I used would be best), the picture you want to embroider, and some Glad Press'n Seal. An old acquaintance had a little girl this past Earth Day, and since we'll be seeing them on Saturday I thought it would be nice to take her a little something for the baby.

Lay a sheet of the Press'n Seal, sticky side down, over your print out. Trace it with your permanent marker.

Peel it off the paper and place it onto your bib. Press it into place.

Place it into your embroidery hoop.

Embroider right over the plastic.

When you're done, gently peel the plastic away from your stitching.

And you're done!
This works better for more open designs. It was really easy to peel away the plastic from the globe, but in the tiny parts around the letters it was a bit of a pain. You can do it, but it will take some patience.
Labels: how-to, sewing

 You'll need a permanent marker (a finer tip than the one I used would be best), the picture you want to embroider, and some Glad Press'n Seal. An old acquaintance had a little girl this past Earth Day, and since we'll be seeing them on Saturday I thought it would be nice to take her a little something for the baby.
 Lay a sheet of the Press'n Seal, sticky side down, over your print out. Trace it with your permanent marker.


4 Comments:
love this tip! I'll have to try it.
That bib is adorable!
Ooh! Good tip! I'd never figured out how to do it if I couldn't either see through the fabric to trace or do it free-hand.
NO WAY! This is genius, Sara. I would have never thought of that, but I can tell you know, I sure will use it! Thank you so much for sharing this tip and for the step by step photos.
Cute bib. :)
Post a Comment
Subscribe to Post Comments [Atom]
<< Home